<?xml version="1.0" encoding="utf-8"?><feed xmlns="http://www.w3.org/2005/Atom" ><generator uri="https://jekyllrb.com/" version="4.2.2">Jekyll</generator><link href="/feed.xml" rel="self" type="application/atom+xml" /><link href="/" rel="alternate" type="text/html" /><updated>2026-03-16T19:01:23+00:00</updated><id>/feed.xml</id><title type="html">Trident’s C64 Demo Details</title><subtitle>All the Details from the Commore 64 Demos by Trident / Fairlight</subtitle><author><name>Trident</name><email>your.email@example.com</email></author><entry><title type="html">A Simple Technique for Overlapping IRQ Handlers</title><link href="/overlapping-irq-handlers/" rel="alternate" type="text/html" title="A Simple Technique for Overlapping IRQ Handlers" /><published>2026-03-16T10:00:00+00:00</published><updated>2026-03-16T10:00:00+00:00</updated><id>/overlapping-irq-handlers</id><content type="html" xml:base="/overlapping-irq-handlers/"><![CDATA[<p>Overlapping IRQ handlers is a a neat trick that allow us to write long-running subroutines without worrying that they will interfere with our other raster interrupts.</p>

<p>This article introduces a simple macro that allow us to do overlapping IRQ handlers so easily that they can be used for pretty much every long-running subroutine we call from our raster interrupts.</p>

<p>There is a longer version of this in my talk at Fjälldata 2026:</p>

<div style="text-align:center;">
  <div style="position:relative; width:100%; max-width:560px; aspect-ratio:16/9; margin:0 auto;">
    <iframe style="position:absolute; top:0; left:0; width:100%; height:100%;" src="https://www.youtube.com/embed/tqX42YoncaA?si=AHkTIA1IuXTG376m&amp;start=40" title="YouTube video player" frameborder="0" allow="accelerometer; autoplay; clipboard-write; encrypted-media; gyroscope; picture-in-picture; web-share" referrerpolicy="strict-origin-when-cross-origin" allowfullscreen="">
    </iframe>
  </div>
</div>

<h2 id="rastertime-on-the-c64">Rastertime on the C64</h2>

<p>On the C64, the CPU and the graphics chip (the <a href="https://en.wikipedia.org/wiki/MOS_Technology_VIC-II">VIC-II</a>) are in perfect synch. Each cycle, the CPU runs one cycle and the VIC chip runs one cycle. Sometimes the VIC chip needs to access memory and then it steals a few cycles from the CPU.</p>

<p>This means that everything the CPU does can be measured in the time it takes to paint pixels on the screen. Each CPU cycle matches 8 pixels and every line of pixels corresponds to 63 cycles (unless there are cycled stolen by the VIC chip) – this is typically called one raster line.</p>

<p>This is typically what we mean with <em>rastertime</em>: the time between two raster lines on the screen. Rastertime is typically measured in rasterlines. So if we say that a subroutine has a rastertime of 10 lines, that means that, roughly speaking, that the subroutine consumes some 630 cycles of CPU time.</p>

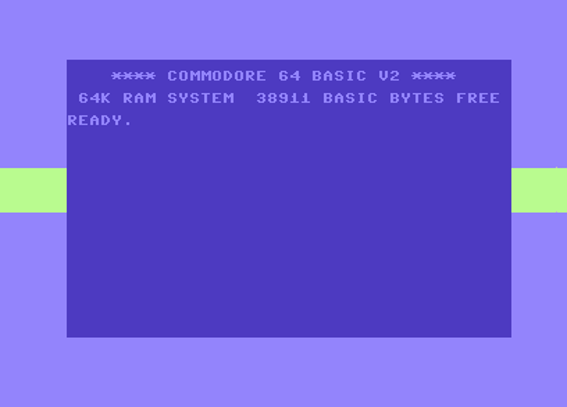
<p>Rastertime can be visualized easily. By setting the border color to a different color before the subroutine is called and resetting it after the subroutine has returned, we get an immediate visual repressentation of that subroutine’s rastertime.</p>

<p><img src="/assets/images/overlapping-irq-handlers/rastertime.png" alt="Raster time" title="The rastertime of a subroutine displayed by setting the border to a different color during the invocation of the subroutine" /></p>

<p>The code for this, using <a href="/anonymous-irq-handlers/">anonymous IRQ handlers</a>, looks something like this:</p>

<div class="language-plaintext highlighter-rouge"><div class="highlight"><pre class="highlight"><code>irq:
{
    irq_wait_rasterline($80)
    dec $d020
    jsr subroutine
    inc $d020

    jmp irq
}
</code></pre></div></div>

<h2 id="rastertime-between-interrupts">Rastertime Between Interrupts</h2>

<p>Almost everything we do on the screen in a C64 demo has to be updated at 50 frames per second for it to look smooth. With 63 cycles per rasterline, and 312 rasterlines per frame, that gives us a total cycle budget of 19656 cycles per frame. On top to of that, we may lose a few thousand cycles because of the VIC chip stealing cycles (depending on how we tweak it at runtime).</p>

<p>But, in addition to the total cycle budget, we often have to face another challenge: the rastertime between two interrupts. By default on the C64, when one interrupt is handled, other interrupts are blocked. Once we return from the interrupt handler, new interrupts can occur.</p>

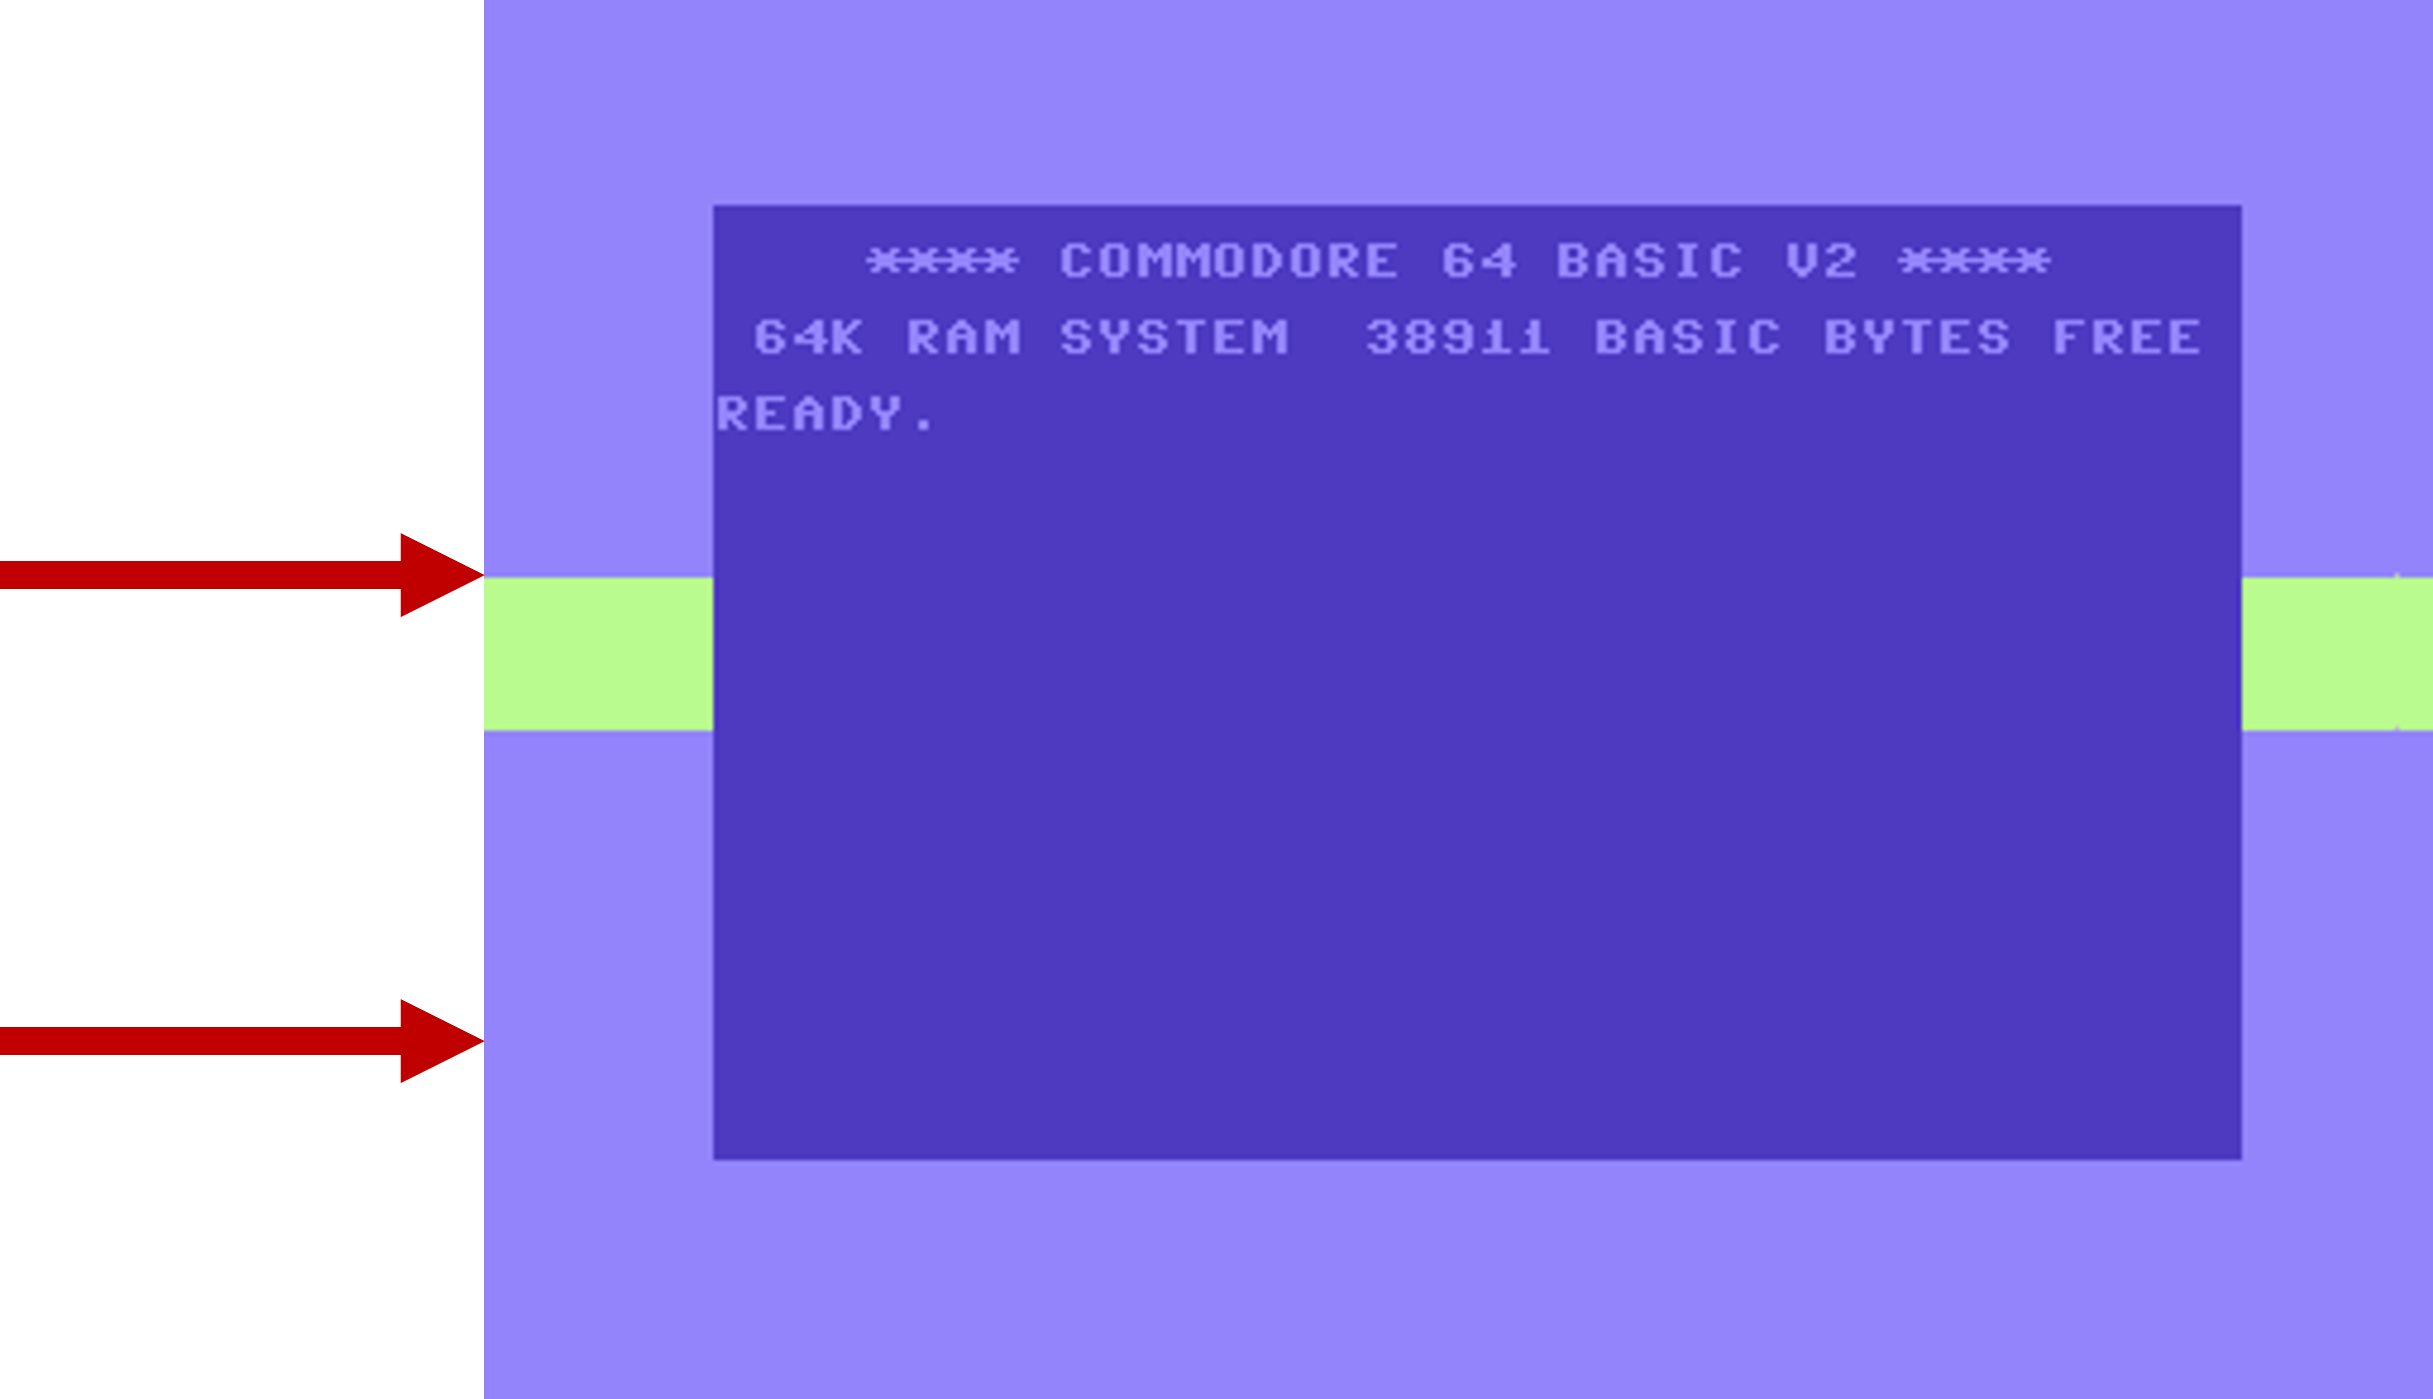
<p>In the pictures below, the red arrows indicate where a raster interrupt happens. In the left picture, the first raster interrupt is handled in good time before the second raster interrupt happens. This is fine: the first interrupt handlers will have returned, and re-enabled interrupts, before the second one occurs.</p>

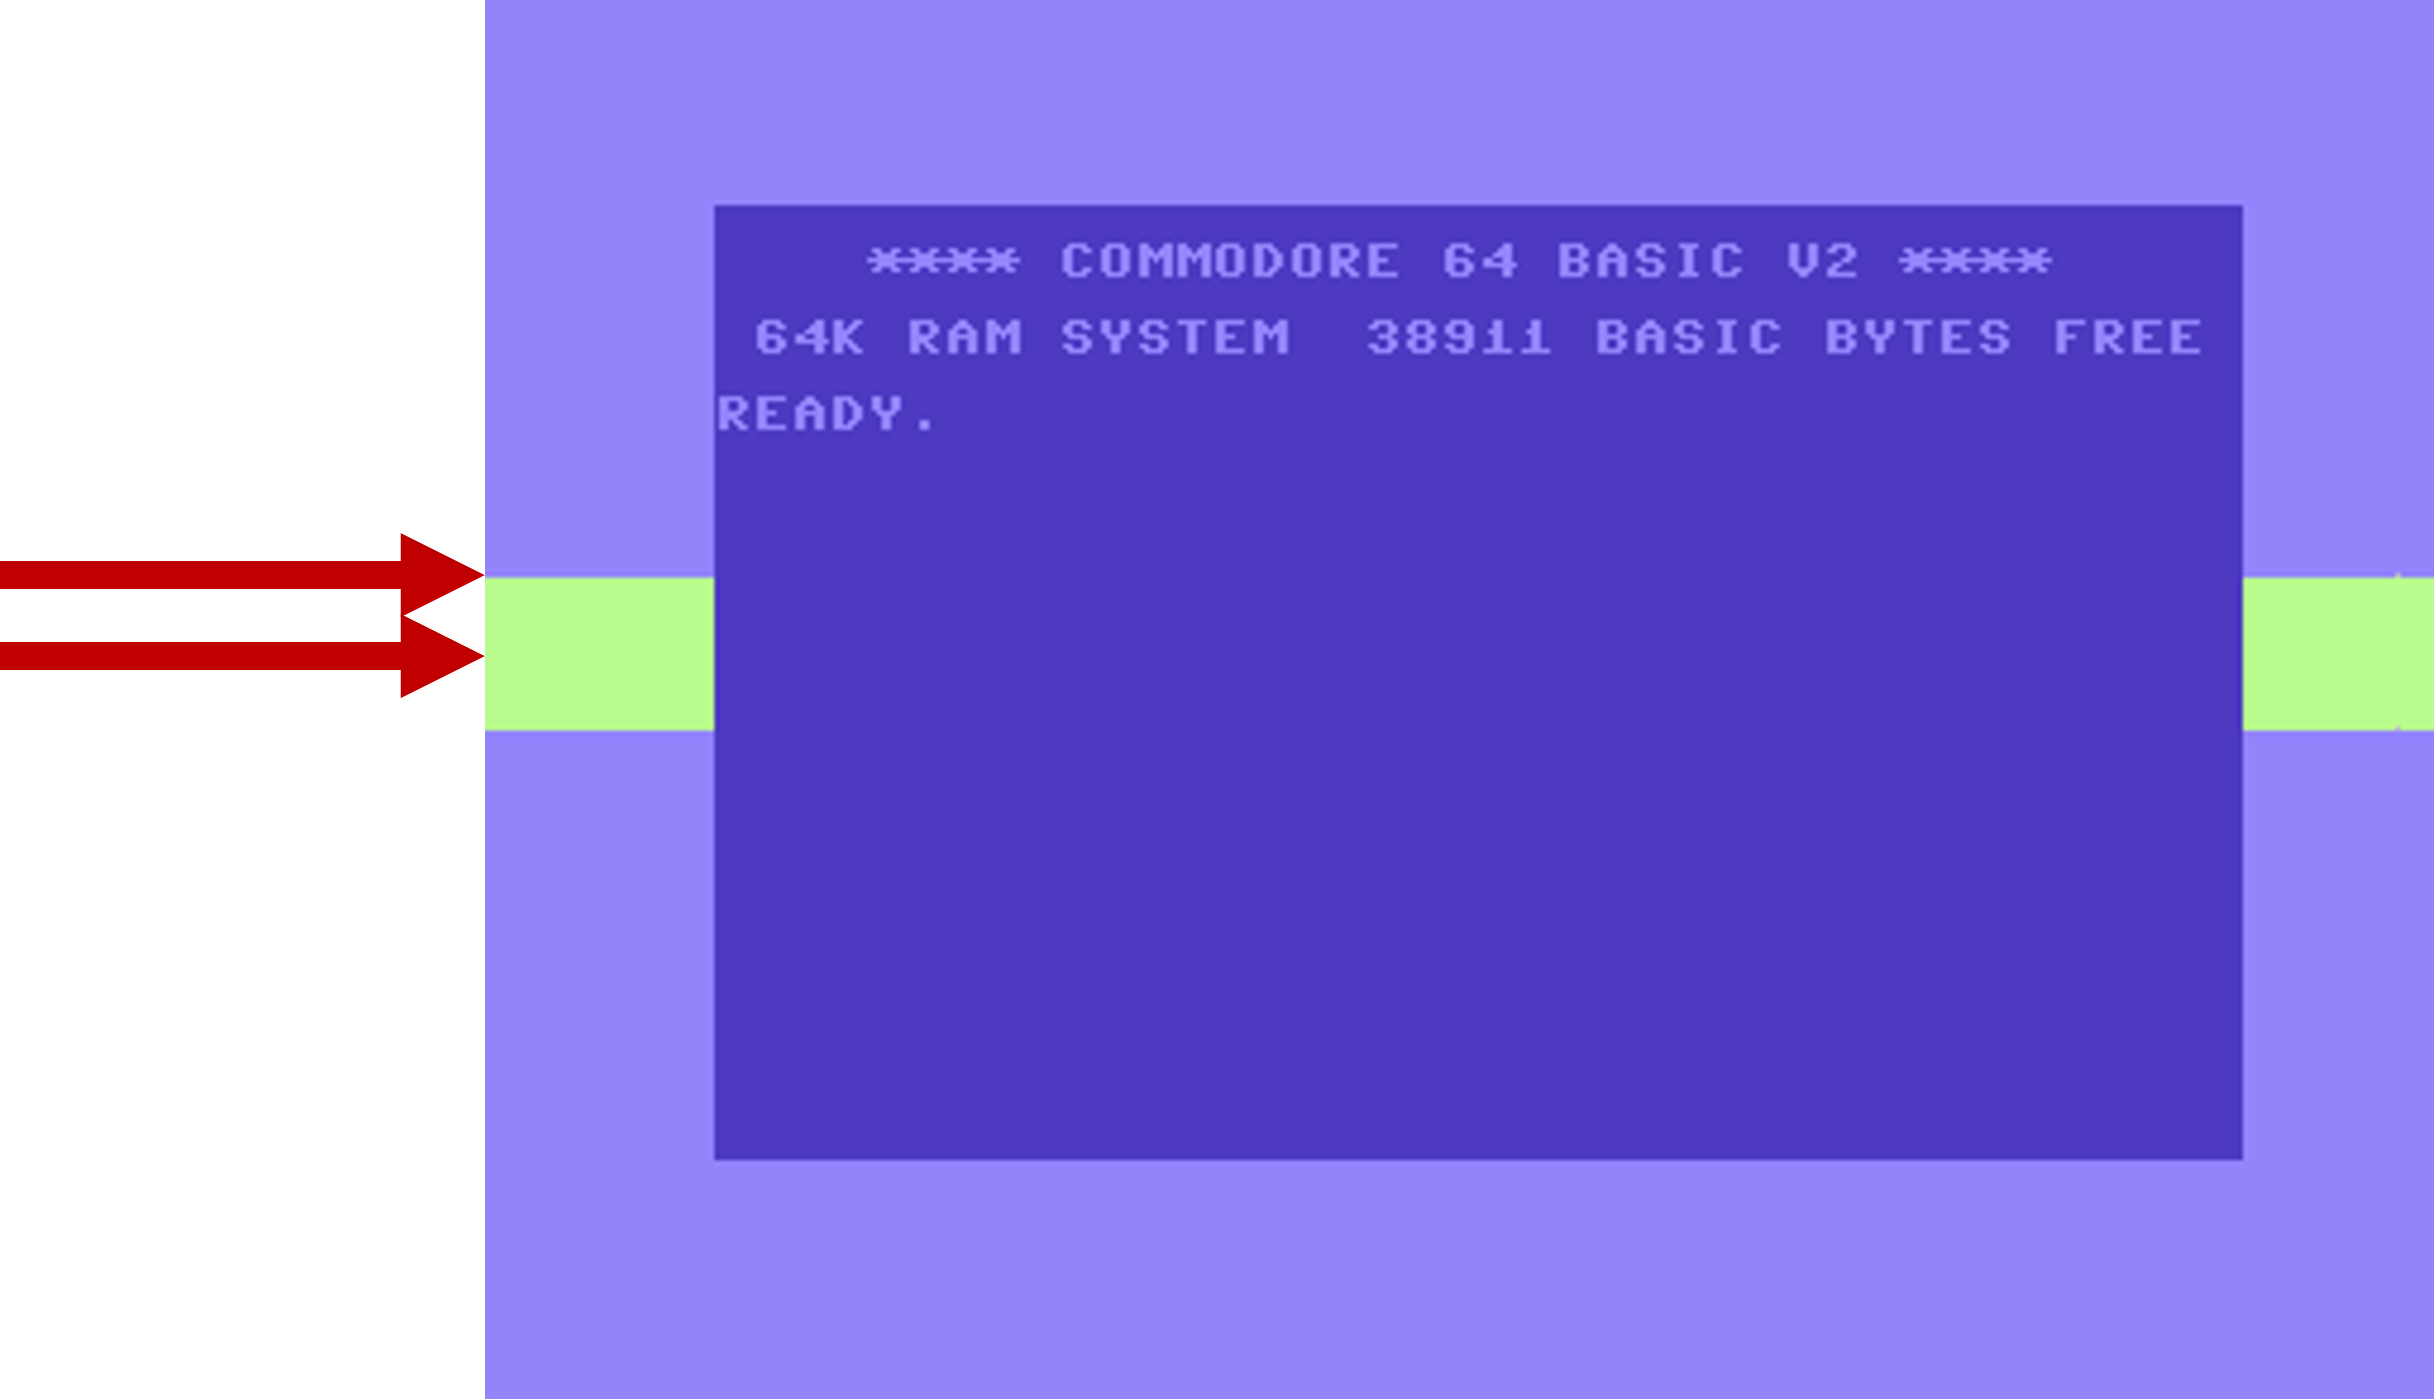
<p>But things are not as good in the right picture. Here, the second raster interrupt is scheduled to occur before the first one completed. This will result in a frame-skip: the second raster interrupt will happen on in the next frame.</p>

<div class="image-gallery two-images">
  <img src="/assets/images/overlapping-irq-handlers/rastertime2.png" alt="Two IRQ handlers spread out" />
  <img src="/assets/images/overlapping-irq-handlers/rastertime3.png" alt="Two IRQ handlers too close together" />
</div>

<p>Frame-skips are the bane of every C64 demo programmer. They will appear as highly visble glitches on the screen and, because the music routine has to be called at exactly 50 Hz, there will be an audiable glitch as well. Horrible!</p>

<p>We can solve this situation in several different ways:</p>
<ol>
  <li>Split the subroutine in the first interrupt handler into two chunks, and call the second chunk in the second interrupt handler.</li>
  <li>Call the long-running subroutine from the main loop instead of from the interrupt handler.</li>
  <li>Implement a multi-tasking mechanism.</li>
  <li>Implement overlapping IRQ handlers.</li>
</ol>

<p>The talk in the video above goes into detail on how to do 1-3 in the list above. Here we will focus on number 4, overlapping IRQ handlers.</p>

<h2 id="overlapping-irq-handlers">Overlapping IRQ Handlers</h2>

<p>Overlapping IRQ handlers is a technique often used by C64 demo coders to avoid rastertime problems between interrupt handlers.</p>

<p>This article presents a very simple implementation of overlapping IRQ handlers that adds no additional complexity to the code that is using it. Is so easy to use that it can be used widely, even in situations where there is plenty of rastertime available. This makes the resulting code much more flexible than it otherwise would have been: the called subroutines can now use as much rastertime as needed, without having to cater for them being called from an interrupt context.</p>

<p>The overhead is very low: 12 bytes of memory and 19 cycles per usage.</p>

<h3 id="how-overlapping-irq-handlers-work">How Overlapping IRQ Handlers Work</h3>

<p>The idea is simple: inside the interrupt handler, set up the next raster interrupt, acknowledge the existing raster interrupt, then explicitly enable interrupts, before calling the subroutine you wish to call. The next raster interrupt will now take place on top of the subroutine, in case it has not yet completed.</p>

<p>In case the subroutine had already completed, the effect will be exactly the same as when running with no overlapping IRQ handlers: the next raster interrupt handler will execute when its interrupt happens.</p>

<p>The prereuisite for this technique is that we store and restore processor registers to the stack in our interrupt handlers. This ensures that they will be able to execute on top of each other.</p>

<h3 id="handling-reentrancy-with-one-flag">Handling Reentrancy With One Flag</h3>

<p>But there is one big problem that we need to solve before we can run overlapping IRQ handlers as our default mechanism: reentrancy. That is, what happens if our subroutine does not finish until its interrupt handler gets called again, on the next frame?</p>

<p>If our subroutine gets called again on top of each other, two problems will happen:</p>
<ul>
  <li>We may run out of stack, if this happens over and over again.</li>
  <li>The subroutine may fail completely, because its code was never intended to be called on top of itself.</li>
</ul>

<p>Both of these problems are difficult to debug. They will most likely result in a seemingly random crash because the stack overwrites itself or because of a seemingly random failure of the called subroutine.</p>

<p>Fortunately, there is an easy fix for this problem. For every overlapping IRQ handler, we keep a flag that signals if the subroutine is currently being called. If it is already called, we avoid calling it on top of itself.</p>

<p>We can even save memory by encoding this flag as self-modifying code inside the calling code.</p>

<h3 id="the-code">The Code</h3>

<p>All of this can now be nearly implemented as a new macro, in addition to our <a href="/anonymous-irq-handlers/">anonymous IRQ handlers</a>:</p>

<div class="language-plaintext highlighter-rouge"><div class="highlight"><pre class="highlight"><code>.macro irq_call_wait_rasterline(subroutine, rasterline) {
   irq_setup(next, rasterline)

    // This is the flag that indicates if the subroutine has been called or not:
running: lda #0
    // If we have already called this subroutine, we will not call it again now
    bne dont_call

    // Set the flag so that any subsequent invokations will avoid calling the subroutine
    inc running + 1

    // Acknowledge the raster interrupt with the VIC
    inc $d019

    // Enable IRQs for the CPU
    cli

    // Call the subroutine - this call may take a very long time
    jsr subroutine

    // Once the subroutine is done, we reset the flag again
    lda #0
    sta running + 1
dont_call:
    // We exit the interrupt handler here, 
    // both if we called the subroutine, or if we skipped it
    irq_leave()
next:
    // We will arrive here because of the raster intterupt on the line given by rasterline
    irq_enter()
}
</code></pre></div></div>

<p>That’s it! Not quite as neat as the <a href="/anonymous-irq-handlers/">anonymous IRQ handlers</a>, but reasonably self-explanatory.</p>

<p>Now let’s take a look at how to use this. Let’s say we want to call three subroutines, which we might call <code class="language-plaintext highlighter-rouge">red</code>, <code class="language-plaintext highlighter-rouge">green</code>, and <code class="language-plaintext highlighter-rouge">blue</code>, on given places on the screen. We simply implement our IRQ code like this:</p>

<div class="language-plaintext highlighter-rouge"><div class="highlight"><pre class="highlight"><code>irq:
{
    irq_wait_rasterline($18)

    // We are now at rasterline $18, call red and wait until rasterline $64
    irq_call_wait_rasterline(red, $64)

    // We are now at rasterline $64, call green and wait until rasterline $b0
    irq_call_wait_rasterline(green, $b0)

    // We are now at rasterline $64, call blue and wait until rasterline $ff
    irq_call_wait_rasterline(blue, $ff)

    // We are now at rasterline $ff

    jmp irq
}
</code></pre></div></div>

<p>This will result in the following screen:</p>

<p><img src="/assets/images/overlapping-irq-handlers/rgb.png" alt="Overlapping IRQ handlers" title="Three subroutines, red, green, and blue, are called with overlapping IRQ handlers" /></p>

<p>In this case, the subroutines did not actually end up overlap each other at all. But if we slightly change the raster lines, we get a different picture:</p>

<p><img src="/assets/images/overlapping-irq-handlers/rgb2.png" alt="Overlapping IRQ handlers" title="Three subroutines, red, green, and blue, are called with overlapping IRQ handlers" /></p>

<p>Here we see the <code class="language-plaintext highlighter-rouge">green</code> subroutine interrupting the <code class="language-plaintext highlighter-rouge">red</code> one. Then <code class="language-plaintext highlighter-rouge">green</code> is itself interrupted by the <code class="language-plaintext highlighter-rouge">blue</code> subroutine. When the <code class="language-plaintext highlighter-rouge">blue</code> subroutine finishes, we see <code class="language-plaintext highlighter-rouge">green</code> continue until it is done. Then <code class="language-plaintext highlighter-rouge">red</code> will finally get the CPU back and can continue until it is finished.</p>

<p>In this example we also see another sideeffect of overlapping IRQ handlers: we have an ordering of priority. The subroutine that gets called first has to wait for the later ones to finish.</p>

<h2 id="whe-to-use-overlapping-irq-handlers">Whe to use Overlapping IRQ Handlers</h2>

<p>Because of the easy-to-use macro, overlapping IRQ handlers can be used pretty much every time you need to call a potentially long running subroutine from an interrupt handler.</p>

<p>Myself, I use them all the time, making me worry way less about rastertime than I used to do. See the talk for a few examples.</p>

<h2 id="the-full-source-code">The Full Source Code</h2>

<p>For reference, here is the full source code for this (in Kickasm format):</p>

<div class="language-plaintext highlighter-rouge"><div class="highlight"><pre class="highlight"><code>.macro irq_setup(irqhandler, rasterline) {
    lda #rasterline
    sta $d012 // Set the low 8 bits of the rasterline in $d012
    lda $d011 // Set the 9th bit of the rasterline in the 8th bit of $d011
    .if (rasterline &lt; $100) {
        and #$7f
    } else {
        ora #$80
    }
    sta $d011

    lda #&lt;irqhandler
    sta $fffe
    lda #&gt;irqhandler
    sta $ffff // Set the interrupt handler address
}
.macro irq_enter() {
    pha
    txa
    pha
    tya
    pha  // Store registers on the stack
}
.macro irq_leave() {
    inc $d019 // Acknowledge the raster interrupt

    pla
    tay
    pla
    tax
    pla  // Restore processor registers from the stack
    rti  // Return from interrupt
}

.macro irq_wait_rasterline(rasterline) {
    irq_setup(anonymous, rasterline)
    irq_leave()
anonymous:
    irq_enter()
}


.macro irq_call_wait_rasterline(subroutine, rasterline) {
   irq_setup(next, rasterline)

running: lda #0
    bne dont_call
    inc running + 1
    inc $d019
    cli
    jsr subroutine
    lda #0
    sta running + 1
dont_call:
    irq_leave()
next:
    irq_enter()
}

    * = $0801
    BasicUpstart(start)

    * = $0810
start:
{
    lda #$7f
    sta $dc0d // Turn off timer interrupts
    lda $dc0d // Acknowledge any lingering timer interrupt

    sei       // Disable interrupts while we work on the interrupt settings

    lda #$35
    sta $01   // Turn off ROM

    lda #$01
    sta $d01a // Enable raster interrupts

    irq_setup(trampoline, 0) // Set up our trampoline interrupt at the top of the screen

    cli       // Enable interrupts

              // Here we could load the next part, but for now, just do an
    jmp *     // infinite loop - the interrupt handlers drive everything now

trampoline:
{
    irq_enter()
    jmp irq
}
}

irq:
{
    irq_wait_rasterline($18)

    lda #0
    sta $d011

    irq_call_wait_rasterline(red, $64)

    irq_call_wait_rasterline(green, $b0)

    irq_call_wait_rasterline(blue, $ff)

    jmp irq
}

red:
{
    lda $d020
    pha
    lda #2
    sta $d020
    ldx #0
!:
    {
        ldy #14
    !:
        dey
        bpl !-
    }
    inx
    cpx #40
    bne !-
    pla
    sta $d020
    rts
}
green:
{
    lda $d020
    pha
    lda #5
    sta $d020
    ldx #0
!:
    {
        ldy #14
    !:
        dey
        bpl !-
    }
    inx
    cpx #40
    bne !-
    pla
    sta $d020
    rts
}

blue:
{
    lda $d020
    pha
    lda #6
    sta $d020
    ldx #0
!:
    {
        ldy #14
    !:
        dey
        bpl !-
    }
    inx
    cpx #40
    bne !-
    pla
    sta $d020
    rts
}
</code></pre></div></div>]]></content><author><name>Trident</name></author><summary type="html"><![CDATA[Overlapping IRQ handlers is a a neat trick that allow us to write long-running subroutines without worrying that they will interfere with our other raster interrupts.]]></summary><media:thumbnail xmlns:media="http://search.yahoo.com/mrss/" url="/assets/images/overlapping-irq-handlers/rastertime3.png" /><media:content medium="image" url="/assets/images/overlapping-irq-handlers/rastertime3.png" xmlns:media="http://search.yahoo.com/mrss/" /></entry><entry><title type="html">Anonymous IRQ Handlers</title><link href="/anonymous-irq-handlers/" rel="alternate" type="text/html" title="Anonymous IRQ Handlers" /><published>2026-03-13T10:00:00+00:00</published><updated>2026-03-13T10:00:00+00:00</updated><id>/anonymous-irq-handlers</id><content type="html" xml:base="/anonymous-irq-handlers/"><![CDATA[<p>Anonymous IRQ (Interrupt Request Handlers) is a technique for making Commodore 64 demo programming easier by making interrupt handlers sequential: your code will be neatly kept in one place and its structure makes it easy to understand exactly what it is doing.</p>

<p>I developed this technique after struggling with messy interrupt handlers for some 30+ years. And it made C64 programming so much more fun, because I no longer have to think about low-level details.</p>

<p>The anonymous IRQ handlers technique was also covered in my talk at Fjälldata 2025, which can be seen here:</p>

<div style="text-align:center;">
  <div style="position:relative; width:100%; max-width:560px; aspect-ratio:16/9; margin:0 auto;">
    <iframe style="position:absolute; top:0; left:0; width:100%; height:100%;" src="https://www.youtube.com/embed/JwS90xWBYCQ?si=rO0O5Aag9A5Xx35W&amp;start=55" title="YouTube video player" frameborder="0" allow="accelerometer; autoplay; clipboard-write; encrypted-media; gyroscope; picture-in-picture; web-share" referrerpolicy="strict-origin-when-cross-origin" allowfullscreen="">
    </iframe>
  </div>
</div>

<h2 id="background-commodore-64-raster-interrupts">Background: Commodore 64 Raster Interrupts</h2>

<p>When writing C64 demos, everything is driven by the action on the screen. And on the C64 we have a neat way to drive action on the screen in code: raster interrupts.</p>

<p>A raster interrupt happens on specific raster line on the screen. The raster line is provided by writing a value into the <code class="language-plaintext highlighter-rouge">$d012</code> register (you may also need to write one bit to the <code class="language-plaintext highlighter-rouge">$d011</code> register, but ignore that for now). And when the graphics chip is about to paint that line on the screen, it sends an interrupt signal to the CPU. This causes the CPU to interrupt whatever is was doing and jump to an interrupt routine. The interrupt routine’s memory address is taken from the <code class="language-plaintext highlighter-rouge">$fffe</code>/<code class="language-plaintext highlighter-rouge">$ffff</code> pair of addresses.</p>

<p>Once our interrupt handler has been called, we can update things on the screen, such as the border color.</p>

<p>That interrupt handler can then set up a new raster interrupt, further down on the screen, to update something more.</p>

<p>This chaining of interrupt handlers is key: this lets the underlying code do something else (such as loading the next part from disk) while we are updating the screen.</p>

<p>The raw assembler code to setup a raster interrupt handler looks something like this:</p>

<div class="language-plaintext highlighter-rouge"><div class="highlight"><pre class="highlight"><code>{
    lda #$7f
    sta $dc0d // Turn off timer interrupts 
    lda $dc0d // Acknowledge any lingering timer interrupt

    sei       // Disable interrupts while we work on the interrupt settings

    lda #$35
    sta $01   // Turn off ROM

    lda #$01
    sta $d01a // Enable raster interrupts

    lda #$40 
    sta $d012 // Set up a raster interrupt on raster line $40

    lda #&lt;irq1
    sta $fffe
    lda #&gt;irq1
    sta $ffff // Make the raster interrupt call the routine in irq1
    
    cli       // Enable interrupts

              // Here we could load the next part, but for now, just do an
    jmp *     // infinite loop - the interrupt handlers drive everything now
}
</code></pre></div></div>

<p>And the interrupt handler might look like this:</p>

<div class="language-plaintext highlighter-rouge"><div class="highlight"><pre class="highlight"><code>irq1:
{
    pha
    txa
    pha
    tya
    pha // save the registers on the stack

    lda #$2 
    sta $d020 // Set the border color to dark red

    lda #$50
    sta $d012 // Set up a new raster interrupt on raster line $50

    lda #&lt;irq2
    sta $fffe
    lda #&gt;irq2
    sta $ffff  // Set up a new interrupt handler for the next interrupt

    inc $d019 // Acknowledge the raster interrupt

    pla 
    tay
    pla
    tax
    pla  // Restore processor registers from the stack
    rti  // Return from interrupt
}
</code></pre></div></div>

<p>The code above set up a second raster interrupt, with an interrupt handler that may look like this:</p>

<div class="language-plaintext highlighter-rouge"><div class="highlight"><pre class="highlight"><code>irq2:
{
    pha
    txa
    pha
    tya
    pha // save the registers on the stack

    lda #$e 
    sta $d020 // Set the border color to light blue again

    lda #$40
    sta $d012 // Set up the raster interrupt on raster line $40 again

    lda #&lt;irq1
    sta $fffe
    lda #&gt;irq1
    sta $ffff  // Set up the first interrupt handler again

    inc $d019 // Acknowledge the raster interrupt

    pla 
    tay
    pla
    tax
    pla  // Restore processor registers from the stack
    rti  // Return from interrupt
}
</code></pre></div></div>

<p>If we run this code, the result will look something like this:</p>

<p><img src="/assets/images/anonymous-irq-handlers/basic-screen.png" alt="Border colors" title="The BASIC screen with changed border colors" /></p>

<p>The border color is switched to dark red at rasterline $40 and then back to light blue at rasterline $50.</p>

<p>From looking at this code, there are some obvious repetition that we can encapsulate using assembler macros. This will make the code a little easier to follow, so let’s do that.</p>

<div class="language-plaintext highlighter-rouge"><div class="highlight"><pre class="highlight"><code>.macro irq_setup(irqhandler, rasterline) {
    lda #rasterline
    sta $d012 // Set the low 8 bits of the rasterline in $d012
    lda $d011 // Set the 9th bit of the rasterline in the 8th bit of $d011
    .if (rasterline &lt; $100) {
        and #$7f
    } else {
        ora #$80
    }
    sta $d011

    lda #&lt;irqhandler
    sta $fffe
    lda #&gt;irqhandler
    sta $ffff // Set the interrupt handler address
}
.macro irq_enter() {
    pha
    txa
    pha
    tya
    pha  // Store registers on the stack
}
.macro irq_leave() {
    inc $d019 // Acknowledge the raster interrupt

    pla 
    tay
    pla
    tax
    pla  // Restore processor registers from the stack
    rti  // Return from interrupt
}
</code></pre></div></div>

<p>Now our interrupt handlers are briefer:</p>

<div class="language-plaintext highlighter-rouge"><div class="highlight"><pre class="highlight"><code>irq1:
{
    irq_enter()

    lda #$2 
    sta $d020 // Set the border color to dark red

    irq_setup(irq2, $50) // Next interrupt in the chain at rasterline $50

    irq_leave()
}

irq2:
{
    irq_enter()

    lda #$e 
    sta $d020 // Set the border color to light blue again

    irq_setup(irq1, $40) // Next interrupt at rasterline $40

    irq_leave()
}
</code></pre></div></div>

<p>Although the assembler macros help us make the code easier to read, they do not help with the real problem: that we need to spread our code over multiple interrupt handlers, which we need to give individual names.</p>

<h2 id="the-problem-interrupt-handlers-get-messy-quickly">The Problem: Interrupt Handlers Get Messy, Quickly</h2>

<p>The problem with interrupt handlers is that they need to be in a separate subroutine, which we will have to give a unique name.</p>

<p>We may start with <code class="language-plaintext highlighter-rouge">irq1</code> and <code class="language-plaintext highlighter-rouge">irq2</code>, which is reasonably neat, but eventually we may want to insert another interrupt handler between them. If we call this <code class="language-plaintext highlighter-rouge">irq3</code>, the order will be difficult to maintain, so we might call it <code class="language-plaintext highlighter-rouge">irq1b</code>. And we update the code in <code class="language-plaintext highlighter-rouge">irq1</code> to set up <code class="language-plaintext highlighter-rouge">irq1b</code> instead of <code class="language-plaintext highlighter-rouge">irq2</code>. But what if we now want to change the order of <code class="language-plaintext highlighter-rouge">irq1b</code> and <code class="language-plaintext highlighter-rouge">irq2</code>? We will need to update the code inside both <code class="language-plaintext highlighter-rouge">irq1</code> and <code class="language-plaintext highlighter-rouge">irq1b</code> so that the chain of interrupts is correct. But should we now change the names too? Sometimes we do, and sometimes we don’t, so we end up with a chain of interrupts that may or may not have names that follow their order.</p>

<p>And regardless of the names of our interrupt handlers, their code will be spread out all over the file, which makes it very difficult to see what the code actually is supposed to do.</p>

<p>I was always writing code like this in the past and it made the code trickier and tricker to get right. We can also see this pattern in the source code of many recent demos, such as <a href="https://github.com/bboxy/next-level/tree/main">Next Level by Performers</a>, <a href="https://github.com/wernervanloo/Halloweed4_public">Halloweed 4 by Xenon</a>, and <a href="https://github.com/RobertTroughton/C64Demo-PublicReleases/tree/main/NoBounds">No Bounds by Genesis Project</a>.</p>

<h2 id="the-solution-anonymous-irq-handlers">The Solution: Anonymous IRQ Handlers</h2>

<p>Now what if I told you that there is a way to write interrupt handlers like a sequence where everything is encapsulated in the same subroutine and were we could just “wait” for those raster interrupts to occur:</p>

<div class="language-plaintext highlighter-rouge"><div class="highlight"><pre class="highlight"><code>irq:
{
    irq_wait_rasterline($40)
    lda #$2
    sta $d020

    irq_wait_rasterline($50)
    lda #$e
    sta $d020

    jmp irq
}
</code></pre></div></div>

<p>This code will provide the exact same result as the code above: the border color will be changed to dark red at rasterline $40 and to light blue at rasterline $50. But instead of spreading this code out into multiple IRQ handlers, everything is contained in the same subroutine.</p>

<p>I call this technique anonymous IRQ handlers: inside those <code class="language-plaintext highlighter-rouge">irq_wait_rasterline()</code> they are IRQ handlers, just like in the old code, but they are anonymous: we do not need to give them names.</p>

<p>This is what the <code class="language-plaintext highlighter-rouge">irq_wait_rasterline()</code> macro looks like:</p>

<div class="language-plaintext highlighter-rouge"><div class="highlight"><pre class="highlight"><code>.macro irq_wait_rasterline(rasterline) {
    irq_setup(anonymous, rasterline)
    irq_leave()
anonymous:
    irq_enter()
}
</code></pre></div></div>

<p>Extremely simple!</p>

<p>The next interrupt will be handled by that <code class="language-plaintext highlighter-rouge">anonymous</code> label, which is completely contained inside the macro.</p>

<p>Anonynmous IRQ handlers mean that we don’t need to think about how to name our IRQ handlers. We don’t even need to think of them as IRQ handlers, all we need to think about is what we want to do on the screen, and where we want to do it.</p>

<p>It is now easy to change the order of things, simply by moving the code around inside that <code class="language-plaintext highlighter-rouge">irq</code> subroutine. And updating the place on screen at which that interrupt will occur is easy too: just change the number in the code. The updated code will be exactly as easy to read as the original code was, before the change.</p>

<h3 id="conditionals">Conditionals</h3>

<p>Anonymous IRQ handlers make it easy to selectively chose which IRQ handlers that should be run. And the intent of the code becomes immediately evident from reading it. Like this:</p>

<div class="language-plaintext highlighter-rouge"><div class="highlight"><pre class="highlight"><code>irq:
{
    irq_wait_rasterline($40)
    jsr do_something

    lda should_show_rasterbar
    beq dont_show_rasterbar
    {
        irq_wait_rasterline($50)
        jsr show_rasterbar
    }
dont_show_rasterbar:

    jmp irq
}
should_show_rasterbar:
    .byte 0
</code></pre></div></div>

<h3 id="loops">Loops</h3>

<p>Anonymous IRQ handlers even make it possible to loop around IRQ handlers. For this example we need to define a shorter version of our waiting macro:</p>

<div class="language-plaintext highlighter-rouge"><div class="highlight"><pre class="highlight"><code>.macro irq_wait() {    
    lda #&lt;anonymous
    sta $fffe
    lda #&gt;anonymous
    sta $ffff 
    // Do not set $d012 here - let the caller do that
    irq_leave()
anonymous:
    irq_enter()
}
</code></pre></div></div>

<p>And now we can update the border color in a loop:</p>

<div class="language-plaintext highlighter-rouge"><div class="highlight"><pre class="highlight"><code>irq:
{
    lda #0
    sta color_counter
    lda #$40
    sta rasterline_counter

loop:
    lda rasterline_counter
    sta $d012
    irq_wait()
    lda color_counter
    sta $d020

    inc color_counter
    lda rasterline_counter
    clc
    adc #8
    cmp #$f0
    bne loop
    
    lda #$e
    sta $d020

    jmp irq

color_counter:
    .byte 0
rasterline_counter:
    .byte 0    
}
</code></pre></div></div>

<p>This will result in the following screen output:</p>

<p><img src="/assets/images/anonymous-irq-handlers/loop.png" alt="Border colors" title="The BASIC screen with border colors updated in a loop with anonymous IRQ handlers" /></p>

<h2 id="the-first-irq-handler">The First IRQ Handler</h2>

<p>There is one more thing we need to do here before using or anonymous IRQ handlers: we need to make sure that our <code class="language-plaintext highlighter-rouge">irq</code> subroutine is called with the correct context. Because the first <code class="language-plaintext highlighter-rouge">irq_wait_rasterline()</code> will restore the stack with <code class="language-plaintext highlighter-rouge">irq_restore()</code>, we need to set up the stack correctly before calling it.</p>

<p>The easiest way to do this is to have a trampoline interrupt, which we set up during the initialization code, that will jump into our anonymous IRQ handler subroutine. This code will look something like this:</p>

<div class="language-plaintext highlighter-rouge"><div class="highlight"><pre class="highlight"><code>{
    lda #$7f
    sta $dc0d // Turn off timer interrupts 
    lda $dc0d // Acknowledge any lingering timer interrupt

    sei       // Disable interrupts while we work on the interrupt settings

    lda #$35
    sta $01   // Turn off ROM

    lda #$01
    sta $d01a // Enable raster interrupts

    irq_setup(trampoline, 0) // Set up our trampoline interrupt at the top of the screen
    
    cli       // Enable interrupts

              // Here we could load the next part, but for now, just do an
    jmp *     // infinite loop - the interrupt handlers drive everything now

trampoline:
{
    irq_enter()
    jmp irq
}
}
</code></pre></div></div>

<h2 id="conclusions">Conclusions</h2>

<p>Raster interupts are a cornerstone of C64 demo programming, but the code quickly gets messy after adding a few of them. This makes the code difficult to write and to read, which makes it difficult to change and will make the resulting code error-prone.</p>

<p>Anonymous IRQ handlers is a set of macros that remove the need to give each IRQ handler a name, resulting in code that is sequential and can be contained in a single subroutine. The resulting code is easier to write, easier to read, easier to modify and usually is less error-prone as a result.</p>

<h2 id="full-source-code">Full Source Code</h2>

<p>For reference, here is the full source code for this (in Kickasm format):</p>

<div class="language-plaintext highlighter-rouge"><div class="highlight"><pre class="highlight"><code>.macro irq_setup(irqhandler, rasterline) {
    lda #rasterline
    sta $d012 // Set the low 8 bits of the rasterline in $d012
    lda $d011 // Set the 9th bit of the rasterline in the 8th bit of $d011
    .if (rasterline &lt; $100) {
        and #$7f
    } else {
        ora #$80
    }
    sta $d011

    lda #&lt;irqhandler
    sta $fffe
    lda #&gt;irqhandler
    sta $ffff // Set the interrupt handler address
}
.macro irq_enter() {
    pha
    txa
    pha
    tya
    pha  // Store registers on the stack
}
.macro irq_leave() {
    inc $d019 // Acknowledge the raster interrupt

    pla
    tay
    pla
    tax
    pla  // Restore processor registers from the stack
    rti  // Return from interrupt
}

.macro irq_wait_rasterline(rasterline) {
    irq_setup(anonymous, rasterline)
    irq_leave()
anonymous:
    irq_enter()
}

    * = $0801
    BasicUpstart(start)

    * = $0810
start:
{
    lda #$7f
    sta $dc0d // Turn off timer interrupts
    lda $dc0d // Acknowledge any lingering timer interrupt

    sei       // Disable interrupts while we work on the interrupt settings

    lda #$35
    sta $01   // Turn off ROM

    lda #$01
    sta $d01a // Enable raster interrupts

    irq_setup(trampoline, 0) // Set up our trampoline interrupt at the top of the screen

    cli       // Enable interrupts

              // Here we could load the next part, but for now, just do an
    jmp *     // infinite loop - the interrupt handlers drive everything now

trampoline:
{
    irq_enter()
    jmp irq
}
}

irq:
{
    irq_wait_rasterline($40)
    lda #$2
    sta $d020

    irq_wait_rasterline($50)
    lda #$e
    sta $d020

    jmp irq
}
</code></pre></div></div>]]></content><author><name>Trident</name></author><summary type="html"><![CDATA[Anonymous IRQ (Interrupt Request Handlers) is a technique for making Commodore 64 demo programming easier by making interrupt handlers sequential: your code will be neatly kept in one place and its structure makes it easy to understand exactly what it is doing.]]></summary><media:thumbnail xmlns:media="http://search.yahoo.com/mrss/" url="/assets/images/anonymous-irq-handlers/loop.png" /><media:content medium="image" url="/assets/images/anonymous-irq-handlers/loop.png" xmlns:media="http://search.yahoo.com/mrss/" /></entry><entry><title type="html">Multicolor Ghostbyte Shine-through: How to Make an Unexpanded C64 Border Scroll</title><link href="/ghostbyte-shinethrough/" rel="alternate" type="text/html" title="Multicolor Ghostbyte Shine-through: How to Make an Unexpanded C64 Border Scroll" /><published>2023-01-20T10:00:00+00:00</published><updated>2023-01-20T10:00:00+00:00</updated><id>/ghostbyte-shinethrough</id><content type="html" xml:base="/ghostbyte-shinethrough/"><![CDATA[<p>The Commodore 64 intro <a href="https://csdb.dk/release/?id=228365">Orbit Untold</a> by Fairlight from 2023 (<a href="https://youtu.be/tiMKM1toYTs">youtube link</a>) features a border scroll that looks unexpanded, despite
being placed in the lower border and despite covering the entire visible screen
area. This document explains how this effect is achieved with a technique we call multicolor ghostbyte shine-through.</p>

<h2 id="background">Background</h2>

<p>On the Commodore 64, there are a few ways to produce graphics in the border
area. Two the most commonly used are sprites and ghostbytes.</p>

<p>Sprites are very flexible in terms of what type of graphics we can produce,
including multicolor graphics. But they are limited to 8 sprites per line and their
width is limited to either 24 pixels or 48 expanded pixels per sprite. With
unexpanded sprites, we can get 8 * 24 = 192 pixels wide graphics. This
will cover less than 2/3 of the visible screen area. With expanded
sprites, we can fill the entire visible area, but our pixels will twice as
wide due to the need for expanded sprites.</p>

<p>The ghostbyte is extremely restricted. It provides 8 bits of black pixels that
are repeated every 8 pixels on in the visible screen area when the border is
opened. Also, ghostbytes can only be used in the upper and lower borders and
cannot be used in the side borders.</p>

<p>The three pictures below illustrate how sprites and ghostbytes work. The
leftmost picture shows how the C64 screen looks by default, with all borders
intact. The middle picture shows all 8 sprites in the lower border, with both
the lower and upper borders removed. The sprites are placed adjacent to each
other and expanded in the X direction so that they cover the entire width of
the border area. The third picture shows the effect of the ghostbyte. In this
case, the ghostbyte is set to <code class="language-plaintext highlighter-rouge">$01</code>, resulting in one-pixel wide bands across
the upper and lower borders.</p>

<table>
  <thead>
    <tr>
      <th style="text-align: center">C64 screen with borders</th>
      <th style="text-align: center">Sprites in lower border</th>
      <th style="text-align: center">Ghostbyte $01 in upper and lower border</th>
    </tr>
  </thead>
  <tbody>
    <tr>
      <td style="text-align: center"><img src="/assets/images/unexpanded-border-scroll/c64.png" alt="C64 screen with borders" /></td>
      <td style="text-align: center"><img src="/assets/images/unexpanded-border-scroll/sprite.png" alt="Sprite in lower border" /></td>
      <td style="text-align: center"><img src="/assets/images/unexpanded-border-scroll/ghostbyte.png" alt="Ghostbyte in upper and lower border" /></td>
    </tr>
  </tbody>
</table>

<p>If we combine sprites and ghostbytes, we can produce what looks like
unexpanded graphics in the lower and upper borders.</p>

<h3 id="a-first-approach-ghostbyte-masking">A First Approach: Ghostbyte Masking</h3>

<p>The simplest way to produce what appears to be an unexpanded scroll in the
upper or lower border is to use ghostbyte masking. This involves setting the
sprite priority lower than the ghostbyte priority and use the ghostbyte to
mask out some of the pixels of the expanded sprites.</p>

<p>This makes it possible to produce single-pixel width graphics, as long as the
pixels are positioned under the ghostbyte mask.</p>

<p>The pictures below shows how ghostbyte masking works to make an expanded
letter <code class="language-plaintext highlighter-rouge">A</code> appear to be non-expanded. The <code class="language-plaintext highlighter-rouge">A</code> consists of 4 expanded single
color pixels, that result in an 8 pixel wide <code class="language-plaintext highlighter-rouge">A</code>.</p>

<p><img src="/assets/images/unexpanded-border-scroll/a-without-mask.png" alt="Expanded A" title="A 4 pixel wide A that has been expanded into an 8 pixel wide character" /></p>

<p>This <code class="language-plaintext highlighter-rouge">A</code> is visibly expanded.</p>

<p>By setting the sprite priority so that the sprite is behind the ghostbyte and by
setting the ghostbyte to the pixel pattern <code class="language-plaintext highlighter-rouge">$81</code>, we end up with the <code class="language-plaintext highlighter-rouge">A</code>
below.</p>

<p><img src="/assets/images/unexpanded-border-scroll/a-with-mask.png" alt="Expanded A that does not appear to be expanded" title="A 4 pixel wide A that has been expanded into an 8 pixel wide character, and ghostbyte masking added" /></p>

<p>This <code class="language-plaintext highlighter-rouge">A</code> now looks like it is unexpanded.</p>

<p>This technique has often been used to make border scrolls look like they are
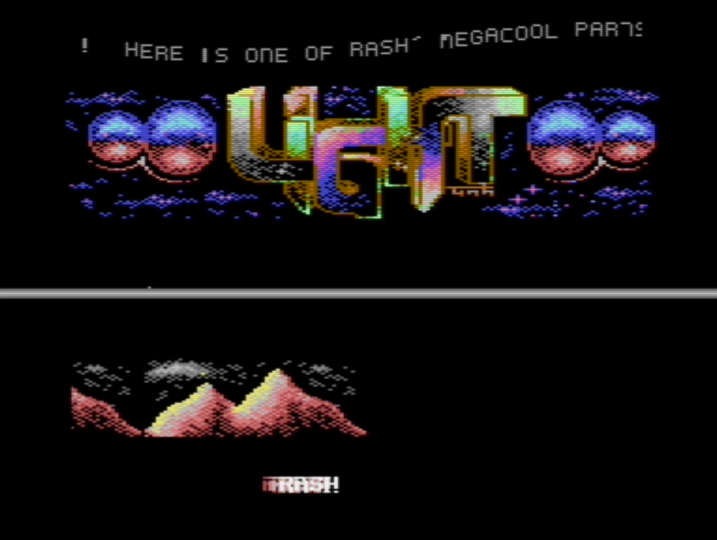
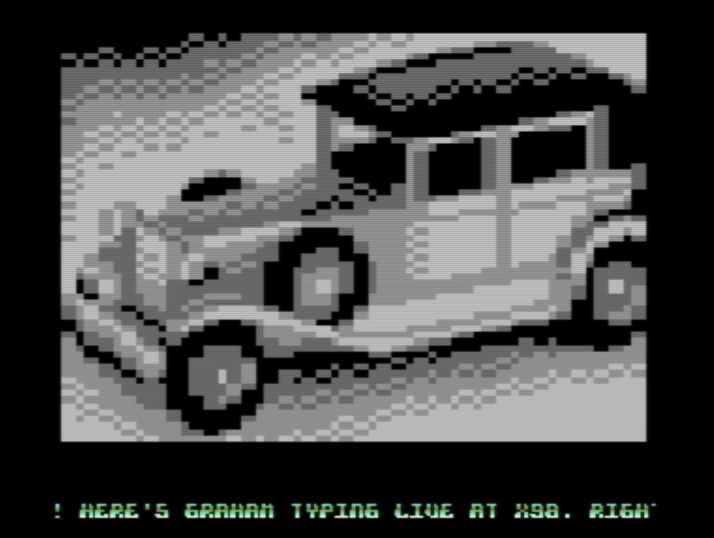
unexpanded. Two examples are Rash’s part in <a href="https://csdb.dk/release/?id=3218">My, Oh My</a> by Light from 1991 (<a href="https://youtu.be/DUDWW_cRXt4?t=844">youtube link</a>) and Graham’s border
scroll in the 1998 Crest and Oxyron production <a href="https://csdb.dk/release/?id=11653">Coma Job</a> (<a href="https://youtu.be/MPc8_xg_NZg?t=97">youtube link</a>).</p>

<table>
  <thead>
    <tr>
      <th style="text-align: center">My, Oh My (1991)</th>
      <th style="text-align: center">Coma Job (1998)</th>
    </tr>
  </thead>
  <tbody>
    <tr>
      <td style="text-align: center"><img src="/assets/images/unexpanded-border-scroll/light-my-oh-my-1991.png" alt="My Oh My" /></td>
      <td style="text-align: center"><img src="/assets/images/unexpanded-border-scroll/crest-oxyron-coma-job-1998.png" alt="Coma Job" /></td>
    </tr>
  </tbody>
</table>

<p>The My Oh My scroller shows some of the limitations of this technique: pixels
that are in the middle of a letter cannot easily be masked, leading to
an awkward looking <code class="language-plaintext highlighter-rouge">M</code> character. Graham’s scroller overcomes this by using a
more appropriate font, as well as a changing background color that makes the
problems less visible.</p>

<p>The color of the ghostbyte mask is restricted to the color black, because the
ghostbyte is always black.</p>

<p>The ghostbyte masking trick is very commonly used in demos from the 1990s era.</p>

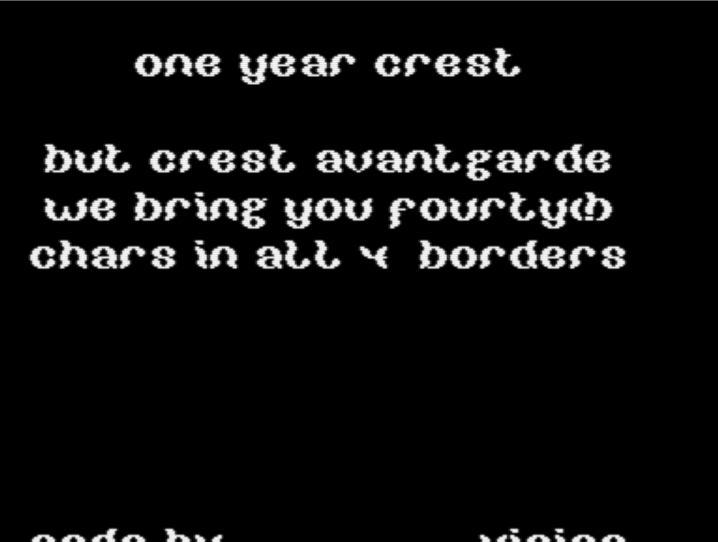
<p>In <a href="https://csdb.dk/release/?id=2554">Crest Avantgarde</a> from 1992, Crossbow and Vision of Crest took the ghostbyte masking trick one step further to create what appears to be a fully unexpanded upscroll (<a href="https://youtu.be/Ze45K_f5YWo?t=342">youtube link</a>). In this case, they change the ghostbyte throughout the screen and use an additional black sprite to cover the side border area. This is evident if we change the background color from black to red.</p>

<table>
  <thead>
    <tr>
      <th style="text-align: center">Crest Avantgarde (1992)</th>
      <th style="text-align: center">The trick revealed</th>
    </tr>
  </thead>
  <tbody>
    <tr>
      <td style="text-align: center"><img src="/assets/images/unexpanded-border-scroll/crest-avantgarde-1992.png" alt="Crest Avantgarde" /></td>
      <td style="text-align: center"><img src="/assets/images/unexpanded-border-scroll/crest-avantgarde-1992-red-background.png" alt="Crest Avantgarde" /></td>
    </tr>
  </tbody>
</table>

<h3 id="multicolor-ghostbyte-shine-through">Multicolor Ghostbyte Shine-through</h3>

<p>Multicolor ghostbyte shine-through - the trick used in Orbit Untold - is similar
to ghostbyte masking, but with a few key differences. Instead of using the
ghostbyte to mask the sprite pixels, we create holes in the pixel data and
let the ghostbyte and background shine through. By crafting specific patterns
with the ghostbyte, we can achieve complex graphics that appear to be
unexpanded even if the sprites are expanded.</p>

<p>There are a couple of more differences between multicolor ghostbyte shine-through and
ghostbyte masking:</p>
<ul>
  <li>the ghostbyte is underneath the sprites, not on top of them</li>
  <li>the ghostbyte is typically changed every raster line</li>
  <li>we use multicolor to be able to selectively decide where our ghostbytes will shine through</li>
</ul>

<p>The main drawback of multicolor ghostbyte shine-through over ghostbyte masking
is that since we are using multicolor, each pixel is now 4 pixels wide.</p>

<p>This trick was probably first found by Crossbow and used in the 1992 Crest
demo <a href="https://csdb.dk/release/?id=2554">Crest Avantgarde</a> (<a href="https://youtu.be/Ze45K_f5YWo?t=1153">youtube link</a>). HCL then used it
in <a href="https://csdb.dk/release/?id=7580">Totally Stoned 2</a> by Booze Design from
1993 (<a href="https://youtu.be/s7DEU-7u7gw?t=1383">youtube link</a>). Cruzer / Camelot made excellent use of the trick
in his <a href="https://csdb.dk/release/?id=171924">GULBData</a> intro from 2018.</p>

<table>
  <thead>
    <tr>
      <th style="text-align: center">Crest Avantgarde (1992)</th>
      <th style="text-align: center">Totally Stoned 2 (1993)</th>
      <th style="text-align: center">GULBData (2018)</th>
    </tr>
  </thead>
  <tbody>
    <tr>
      <td style="text-align: center"><img src="/assets/images/unexpanded-border-scroll/crest-avantgarde-1992-gulb.png" alt="Crest Avantgarde" /></td>
      <td style="text-align: center"><img src="/assets/images/unexpanded-border-scroll/bd-totally-stoned-1992.png" alt="Totally Stoned 2" /></td>
      <td style="text-align: center"><img src="/assets/images/unexpanded-border-scroll/camelot-gulbdata-2018.png" alt="GULBdata" /></td>
    </tr>
  </tbody>
</table>

<p>There are probably several other examples of this trick being used in demos,
but it does not seem to be very widely used. Possibly because it is so hard
to figure out how it is supposed to be done. Myself, I was not
able to figure out how this was done when I saw Crest Avantgarde and Totally
Stoned 2 back in 1992-1993. It wasn’t until seeing Cruzer’s GULBData intro it
finally clicked for me.</p>

<h3 id="making-it-work-a-case-study">Making it Work: a Case Study</h3>

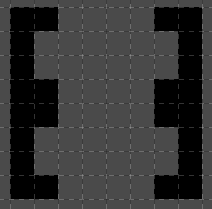
<p>We arrange the ghostbytes, which we change each rasterline, into the pattern
below. The black pixels are the ghostbyte pixels, and the gray pixels are the
background ($d021) color.</p>

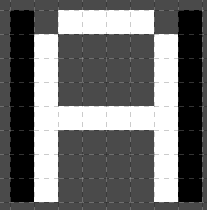
<p><img src="/assets/images/unexpanded-border-scroll/multicolor-ghostbytes.png" alt="Ghostbyte pattern" /></p>

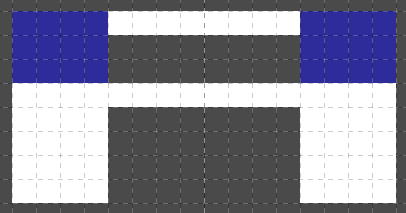
<p>We can then draw an upper case <code class="language-plaintext highlighter-rouge">A</code> in a way where those ghostbyte pixels will shine
through on specific locations. To make the ghostbyte pattern shine through,
we use multicolor <code class="language-plaintext highlighter-rouge">00</code> for those pixels. We set one of the other multicolors to the same color
as the background color, and set a third multicolor to black. The black color is
used to make it blend together with the black ghostbyte pixels.</p>

<p>In the picture below, the blue pixels correspond to the <code class="language-plaintext highlighter-rouge">00</code> multicolor, the
one that will let the underlying ghostbyte and background color shine
through.</p>

<p><img src="/assets/images/unexpanded-border-scroll/multicolor-expanded-a.png" alt="A without the ghostbyte" /></p>

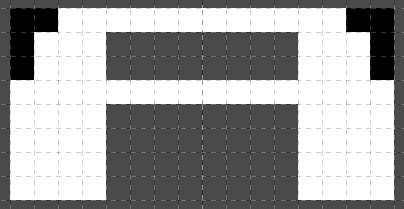
<p>If we apply the ghostbyte mask underneath the letter, it will shine through only on
the blue areas of the <code class="language-plaintext highlighter-rouge">A</code>. If we use white color for the background color, we end up with
a reasonably looking <code class="language-plaintext highlighter-rouge">A</code>:</p>

<p><img src="/assets/images/unexpanded-border-scroll/multicolor-masked-a.png" alt="A with the ghostbyte mask" /></p>

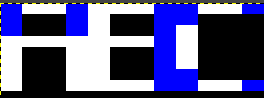
<p>We can now draw an entire font to take advantage of this technique:</p>

<p><img src="/assets/images/unexpanded-border-scroll/abcd-gimp.png" alt="A b c" /></p>

<p>Those are the first characters of the font from the intro, as they were drawn
in gimp. This is the result as they are displayed with the ghostbyte
shine-through and with background raster colors that change on every raster line:</p>

<p><img src="/assets/images/unexpanded-border-scroll/abc-with-colors.png" alt="A b c with colors" /></p>

<p>If we put all this together, we can create an unexpanded border scroll by
drawing selected characters on 7 expanded sprites and moving them
horizontally:</p>

<p><img src="/assets/images/unexpanded-border-scroll/unexpanded-scroll.png" alt="Unexpanded border scroll" /></p>

<p>To reveal what parts of each character use sprite multicolor and what parts
use the background and ghostbyte shine-through, we can use two different
colors. The picture below shows the sprite multicolor in red and the
background colors in green. We can now see what parts of each character are
sprite multicolor and where the background color and ghostbyte shine
through.</p>

<p><img src="/assets/images/unexpanded-border-scroll/ghostbyte-revealed.png" alt="Ghostbyte revealed" /></p>

<h2 id="conclusions">Conclusions</h2>

<p>Multicolor ghostbyte shine-through is a really neat way to produce what
appears to be unexpanded graphics in the lower and upper borders. The trick
has been used a few times over the years, but does not appear to be very
widely adopted, possibly because of how difficult it is to figure out how it
works. The trick uses the fact that the background color of a multicolor
sprite lets the background + ghostbyte to shine through, allowing us to
selectively use ghostbyte shine-through, even within individual characters.</p>

<h2 id="acknowledgments">Acknowledgments</h2>

<p>Many thanks to Cruzer and HCL for reading and commenting on early drafts of
this paper. Also thanks to HCL for revealing how ghostbyte masking was used
for the upscroll in Crest Avantgarde</p>

<p>Orbit Untold credits:</p>
<ul>
  <li>Code + scroll font: trident</li>
  <li>Music: Danko</li>
  <li>Logo + font: tNG</li>
</ul>]]></content><author><name>Trident</name></author><summary type="html"><![CDATA[The Commodore 64 intro Orbit Untold by Fairlight from 2023 (youtube link) features a border scroll that looks unexpanded, despite being placed in the lower border and despite covering the entire visible screen area. This document explains how this effect is achieved with a technique we call multicolor ghostbyte shine-through.]]></summary><media:thumbnail xmlns:media="http://search.yahoo.com/mrss/" url="/assets/images/unexpanded-border-scroll/intro-screenshot.png" /><media:content medium="image" url="/assets/images/unexpanded-border-scroll/intro-screenshot.png" xmlns:media="http://search.yahoo.com/mrss/" /></entry></feed>